


The sort of wall that is prevalent throughout much of the Med, and certainly in Crete, is what we call a "dry stone wall" in the UK. This photo from Crete shows exactly what I was intending to build:

Materials
- 3mm MDF sheets for the bases
- Cork tiles
- Cat litter
- PVA glue
- Paint: brown, grey and light terracotta
- Sand
- Basing material such as flock, clump etc
Tools
- Scroll saw (optional, but it cuts out lots of hard work!) or something to cut the bases with
- A dust mask (to avoid breathing in the MDF dust)
- Dremel or similar tool for sanding edges (again, optional)
- An old baking tray or something similar to tip the cat litter into
- A spray bottle
- Old paint brush
Technique
I recently purchased a scroll saw, which is something that I wish I had bought years ago. It would have saved me countless hours and broken blades, cut fingers etc when cutting up stuff for wargaming. The model I bought was Einhell TH-SS 405E 120 W Scroll Saw from Amazon and cost about £95.00.

I bought the scroll saw to cut another recent purchase. Again, it is something that I wish I had bought years ago: 3mm MDF sheets in A3 size (twice the size of standard A4 paper), so plenty big enough to create some large terrain pieces, or big enough to cut up into lots of smaller pieces such as lengths for the walls. I bought 30x A3 sheets for £27.00, so just less than a quid per sheet. I'm still on the lookout for sheets that come in 2mm, but I have had difficulty finding a stockist - if you know of one, please post a comment below. The MDF makes great base material for all sorts of terrain.

I used the scroll saw to cut the A3 sheets into lengths about 5cm wide. I used the tilting table on the scroll saw to cut the edges at 45 degrees, which helps reduce the "edge" when it is placed on the gaming table i.e. it is less square and therefore less noticeable. Remember to wear your dust mask when cutting the MDF: you don't want to be breathing that stuff in!

I cut some long lengths, some medium sized pieces and then lots of smaller pieces, some with angles cut to allow for creating corners and bends in the modular walls. Below is a small corner piece.

I used my Dremel knock-off (I wish I had stumped up the extra £30 for a proper Dremel) to sand the outside edges of the MDF to create a 45 degree angle on any edges that hadn't been cut that way with the saw.

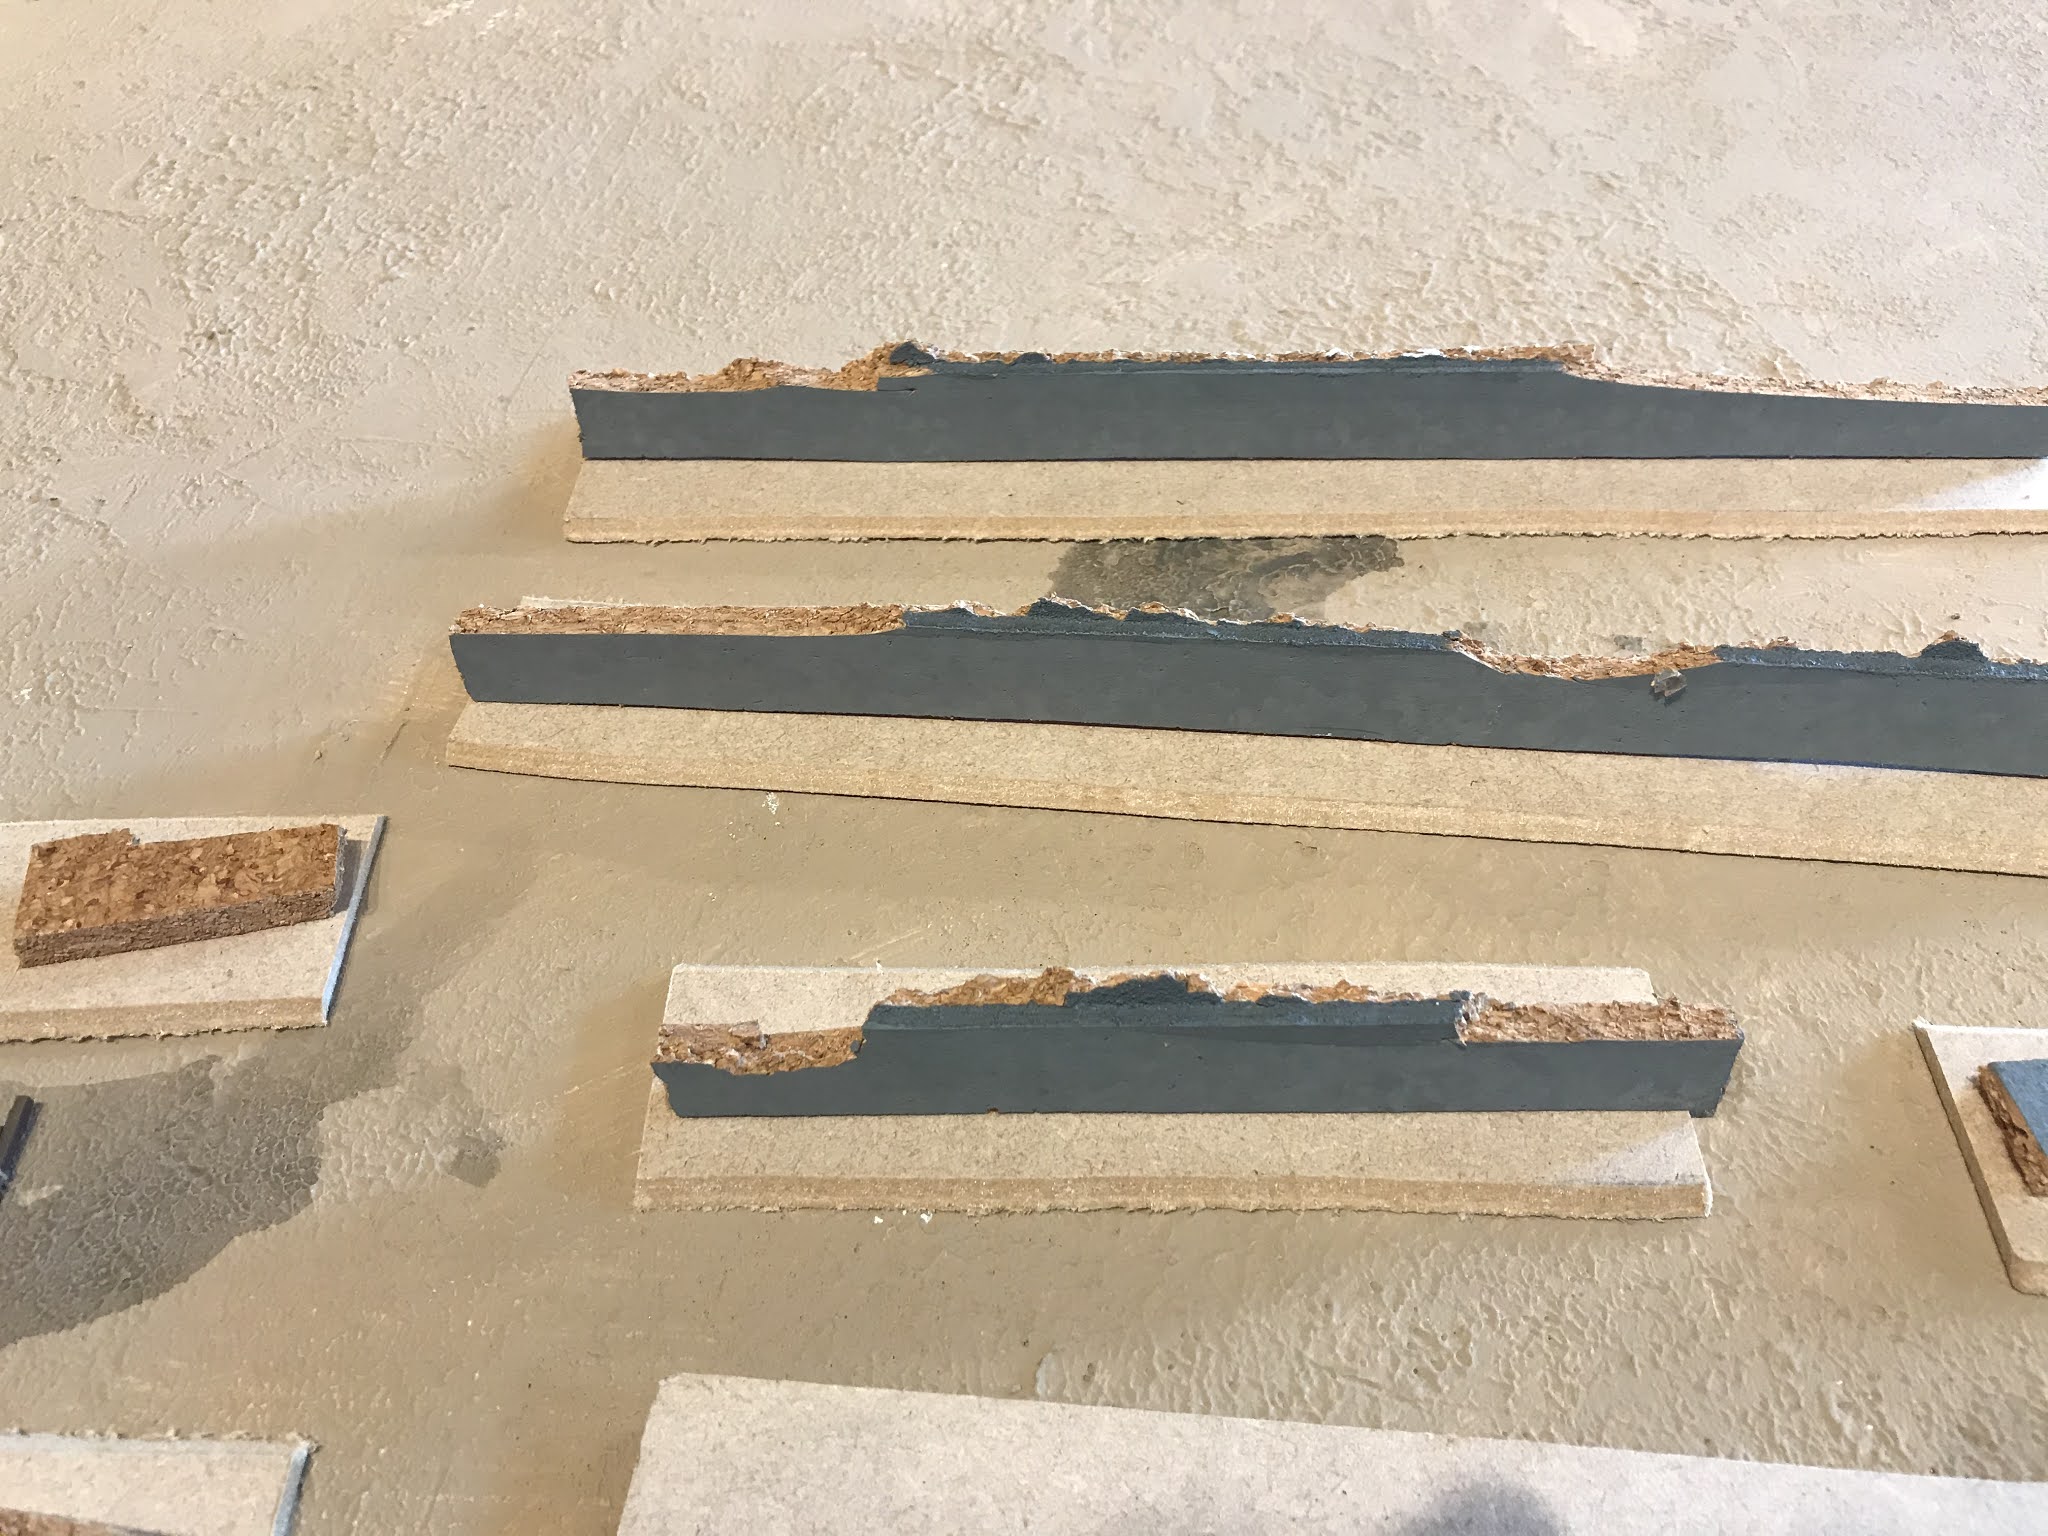
Once I had cut lots of different lengths, and sanded all the edges to create a bevel, I then cut some cork tiles into strips that were the same length as each base. Prior to gluing the cork onto the MDF, I used brown parcel tape on the back of the longer lengths to limit the amount of warping. We are going to be applying lots of watered down PVA later on in the process - when applied to only one side of the MDF, this means that one side gets wet and then dries, which causes it to warp. Sticking the non-stretchy parcel tape on the back of the MDF restricts the warping, especially if you apply a slight reverse bend to the MDF as you apply the tape.

The cork tiles I used were recycled from an earlier sci-fi project and had been glued together to create a double thickness. I guess you could glue two tiles together, or just use single width, depending on how thick you wanted your walls to be. I think that the double thickness looks better, so was glad that I already had these to-hand. Some of the pieces had notches and rough edges cut into the top edge, so that the tops of my walls were not uniform in height.


Once the PVA had dried, I thickly painted PVA onto the facing side of each wall piece and then laid it on its side in the baking tray and then poured the cat litter on and left it for 30 minutes.


The sort of cat litter I used was "clumping" (i.e. absorbent) and looks like lots of little stones. The absorbency is the important characteristic because it allows the PVA to soak into it and stick it to the cork. This cat litter has been in my wargaming store cupboard for ages and I cannot find it online anywhere now, so presume that this brand is no longer available. However, if you pop down to a pet shop, then I'm sure that you can find something suitable.


After half an hour, flip it over and repeat the gluing and application of cat litter on the other side, then leave it to dry for a bit. It doesn't need to be totally dry - just enough to hold most of it in place. Even if you leave it for 24 hours, some of the pebbles are going to fall off, which is why I would recommend applying a second coat, especially to the base of the wall, which makes the bottom a bit thicker than the top. Finally, apply a layer to the top of the wall. You can get a bit of a production line going and create lots of wall pieces - my production was limited by the size of my baking tray. I found that it was best to leave the walls on their side in the cat litter for at least half an hour, so that the PVA attached itself to enough pebbles.

Another reason that you do not need to be too concerned about it being completely dry is that you are going to give it a good soaking in diluted PVA glue. Get your spray bottle (£0.80 from B&Q) and pour in some PVA glue, then top up with water and give it a good shake (after firmly attaching the top, of course!). I used a ratio of about 10% PVA to 90% water.

I waited until all three sides were covered in cat litter pebbles before spraying, but if you wanted to, you could spray between each side. Applying watered down PVA helps fix the pebbles into place and hardens it up making it quite durable. Here is a batch drying in the Welsh sunshine:

It is best to leave the walls to fully dry out before starting on the painting. For the undercoat I used a mocha brown colour and, as I painted it on, watered it down a little to help it flow into all the cracks and also soak up any remaining absorbency in the pebbles. I prefer a dark brown (Chocolate Torte purchased from B&Q a few years ago) as an undercoat, though I know many people use black, but I find that too dark. Leave to dry fully again - this is why it's good to get a production line going with walls at different stages of the process, which allows for drying time between each step.


Once the dark brown undercoat had dried, I "wet brushed" (it's my own patented technique, lol) a dark grey over each whole wall piece. Wet brushing is a bit like that well-known technique, dry brushing, except that you leave a bit more of the paint on the brush before applying it. The grey paint I used originally came from 4Ground, though I don't think they stock it any more. Any dark grey paint should suffice.


Leave the paint to dry before dry-brushing on a lighter grey. You can see the contrast between the two examples in the photo below. I dry brushed a little less of the lighter paint onto the bottom half of the wall to create some "force shading".

Again, leave to dry prior to the next stage of painting. Using an almost-white grey, I very lightly dry brushed the top half of the wall, plus picked out the upper-facing surfaces of any stones at a lower level, which emphasises the forced shading. Hopefully, the photo below illustrates the difference in where the highlighting was applied to.

After another period to allow the highlight colour to dry, I applied the final highlight. This time it was a pale terracotta colour, which was lightly dry brushed over the whole wall. This has the effect of "warming" the colours, but also tying it into the base colour of my Mediterranean terrain board. You can see the final yellow-ish highlight on the right-hand piece below, compared to the whiter looking piece on the left. The whiter highlight "shines through" the yellow and gives that forced shadow effect that I was trying to achieve.

After finishing the colours of the stones in the wall, it is onto the ground next. I used the same pale terracotta and liberally applied to the MDF base, then sprinkled a reddish sand all over it and left to dry. Even before it is completely dry, you can then seal it with more watered down PVA glue.


Once the PVA sealant has fully dried out, you are ready to apply some vegetation to the base and then get it on the gaming table.

If you have any questions or comments, please leave a message in the comments below.
Take cover!

Good to see the Crete terrain develop. Excellent tutorial on building the dry stone walls.
ReplyDeleteThe look excellent! Nice work!
ReplyDeleteVery nicely done sir! Might have to give this a go, I have no shortage of cat litter (I also have no shortage of cats, seven to be exact!).
ReplyDeleteCheers Roger.
Thanks for the comments chaps.
ReplyDeletegreat tutorial - thank you
ReplyDeleteNeat tip with the tape!
ReplyDeleteCheers
Matt
Ok, I have to say...great tutorial, thanks for sharing! Well done on the walls.
ReplyDeleteCheers Stan. ;-)
Delete