Sunday, 9 February 2020

Fallschirmjager uniform colour references

I have just about finished painting the last few miniatures for my Fallschirmjager platoon, but thought I would post up some photos of a book that used as source material. The book these pages come from is called German Soldiers of World War Two and features detailed photographs of models wearing actual uniforms, so is great for matching colours to when painting.


Here are the last 5 off the painting table with their highlights done.


I'm not that happy with them for three reasons:
  1. I couldn't remember the colours that I used when I painted the rest of the platoon, so they don't quite match the "old" ones
  2. My painting skills, which were never that good, seem to have deteriorated
  3. My eyesight has certainly deteriorated since I last picked up a paint brush over a year ago, so I'm struggling to see the finer level of detail needed to apply a quality paint job.

Anyway, here are a few shots of the FJs from the original platoon. I am reasonably pleased with these. Comments welcome!


Miniatures always look better when displayed against some wargaming terrain, so here are a couple of shots of my FJ platoon on my Crete table:


Scale of trees

I thought I would upload a couple of photos to specifically show the scale of the trees that I made in an earlier post.  The lighter green tree in the left of the photo was purchased from 4Ground (though sadly they have stopped retailing them - I must ask Ben why that is) and is about 4-6" tall. The other four trees are from the batch made in my how-to guide.  There is a 28mm figure in the foreground to show the scale relative to the size that I game in.


There was some discussion on TMP about the cost of making trees. I agree that there are other methods (perhaps at a lower cost per unit) for putting some trees on the table, such as the ready-made ones as sold by Woodland Scenics.  For me, there are some other considerations...
  1. I quite enjoy making terrain so don't mind putting in a bit of extra effort and spending a little bit extra.
  2. Building your own trees means that you can choose what size and shape they are - this is where I think that it does become cost-effective to make your own. The largest trees I made are approx. 12" tall, but they are all individually sized between ~4" and 12", so there is lots of variety.  
  3. The shapes of the home made ones are also irregular, so IMHO look more realistic.
  4. By being able to build to bigger scale, I think that it also represents the real size of trees in relation to other models on the gaming table, for example, vehicles and especially buildings. Many conifers are taller than houses, so I wanted to represent this on my gaming table.
I have nothing against store-bought trees - I actually have quite a few on the same table, which I think adds to the overall "look".


The shot above shows the scale of a 4-6" tree (left of the house) and the comparative size of my larger home-made conifers.


Saturday, 1 February 2020

Planting a forest

Planting a Forest  - a How To Guide

Every good wargaming table needs some height to give it that authentic battlefield look; I really don't like flat, uniform table tops, so I try to find ways of adding a bit of real world texture to my gaming tables. One easy way to do that, which also suits nearly every table (I mostly game WW2) are trees.

Obviously, there are other things to spread around your table such as buildings, but they can be very theatre specific; even in northern Europe, the houses in France have a noticeably different style to the houses in Holland, Germany, Italy or even Denmark.  Even walls and hedges can sometimes be a bit too specific to certain parts of the world, whereas you can see the same species of trees (at 28mm scale anyway - I defy anyone to tell the difference between many varieties of model trees at that scale) around most of the world.  Well, certainly across all of Europe and the Mediterranean and even into North Africa and Russia.  ;-)  That covers most of the theatres of WW2, certainly enough for my gaming enjoyment.

One such variety of versatile tree (for terrain-makers at 28mm scale) is the conifer. There are spruce, fir, pine, larch and cedar… and perhaps some more?  The colours and shapes do vary slightly, but the general shape is the same.  Thankfully, for the purposes of terrain-building, we can create generic conifers at a pretty low cost and fill out a table.  Many deciduous varieties are also fairly similar. This blog has some pretty useful source material. Here's a pic of my winter table, which I blogged about a couple of weeks ago.  Most of the trees in this photo were made for a total of about £20, which is less than a quid per tree.


Some of the non-coniferous trees came from my good friends over at 4Ground, though I don't think they sell trees any more.

How to Make Conifers


The trees are made from something called Hedgehog Gutter Brush, which you lay into your gutters to stop leaves and moss from blocking them up.  It also is really great for cutting into tree shapes. I purchased a 4 metre length from Amazon. It comes in a roll like this...

When creating my trees, I cut the brush into different lengths (rather than the uniform height that the trees you buy usually are), which ranged from about 10cm up to 30cm.  You need some heavy duty wire cutters to snip the metal wire.


Once you have snipped the wire brush into lots of different lengths, you then need to trim the black plastic brush into a tree shape. Get yourself a decent, comfortable pair of scissors to do this. When trimming the brush, rotate it and trim at a angle.  Keep rotating and cutting until you've gone all the way round your new tree.  I tend to rotate it by 360 degrees a few times and keep trimming until I am happy with the shape.  It doesn't need to be completely symmetrical, in fact, I think if there is a bit of asymmetry about it, it tends to look better.


You'll notice from the photo above that I have pulled the brush strands out from the bottom to create the trunk.  I've pulled out about 2cm.


Keep trimming all your trees until they are complete. To stop more of the bristles from falling out from either the bottom or top of your newly cut tree, use a tiny amount of hot glue from a hot glue gun on both the top and bottom of your tree.

Next, it gets a bit messy!  In an old tub of PVA glue, I filled it with about 25% PVA and 75% water and gave it a good mix.


Ensure that you have somewhere where you don't mind making a mess...trust me on this!  Top tip though: don't do it outside on a windy day if you want to keep most of your flock.

Dip one of your trees into the PVA tub ensuring that it is getting it fully coated with the PVA/water mix.  Lift it out and let the excess glue drip back into tub before transferring your glue-laden tree into a large tub of flock; sit the two tubs side-by-side to cut down on the mess.  I used dark green coarse turf from Woodland Scenics.


Generously pour more coarse turf over the tree, turning it as you do so, then lift it out of the tub and give it a gentle shake over your turf tub (or a tray) to remove (and recover) most of the excess turf.  Don't be afraid to pour on lots of the turf material - you will recover most of it back in the tub/tray placed beneath it.  When you think that the glue has soaked up as much turf as it can take, transfer your tree to somewhere to dry for a few hours.  I used a piece of foam with some pre-made holes so that the trees were upright and none of the flock/turf was in contact with anything else whilst it was drying.  Be aware that even though you think that the glue has all been soaked up, it hasn't: you are going to have watery glue running down the trees until it starts to dry.  Next time I might experiment with a thicker glue mixture - it needs to be runny enough to coat all the bristles though, so just bear that in mind.

I forgot take photos during the gluing/flocking stage because I got plenty of glue and flock stuck on me.  A pair of nitrile, powder-free gloves from Screwfix are just the job for keeping the colour from permeating your skin. 


Looking back at that photo, it looks like 4 metres of the hedgehog brush made about 30 trees of different sizes. If you are gaming in 15mm, then I guess that you could make even more. Once dry, the PVA does not fix the flock in place particularly well, so you will find that every time you handle bits will fall off, but there is a simple solution to that.  

Do this next bit outside and I would also recommend that you WEAR A DUST MASK to avoid inhaling any glue. Spray the trees one at a time with a spray adhesive, rotating them as you spray to get an even coating of the glue.  Try and get the spray deep into the "branches", but don't go too mad otherwise you'll get through your can of glue pretty quickly.  

I then dusted my trees with a sprinkling of lighter coloured Earth Blend turf from Woodland Scenics, just to highlight the outer leaves of the tree; this also absorbs some of the spray adhesive.  Remember to give it a shake to spread the sprinkled turf across all the bristles and to penetrate into the tree a bit.  Once sprayed and highlighted, place the tree back in the place you used to stand it up and let the adhesive harden; I left mine overnight.  If you don't want to use a lighter colour, then the same dark green is just as good.


The turf should now be fixed to the bristles of the hedgehog brush really well and will stand up to lots of handling on the gaming table or transporting around. Once you have completed this, all that is left to do is mount them onto some bases. 40mm MDF bases work well, which I used for individual trees, but I also glued a couple of trees together onto larger, irregular shaped bases that I had found somewhere.

Use a hot glue gun to place a nice, big dab of glue onto the centre of your base. Twist the bottom of the brush wire into the glue and wiggle it around to create a good point of contact; use a lolly stick or coffee stirrer to smooth the glue up the trunk of the tree, and then leave for a few seconds while it hardens.  Place it to one side before doing the next tree.

Once you have glued all your trees to their bases, get some paint and paint the MDF base and up the trunk of the tree.  I've got several pots of paint from B&Q that I use for various terrain projects.  Any sort of brown will do, though I used Dulux Espresso Shot here.  I wasn't too fastidious in painting the tree trunk because you cannot actually see them once you've got them based up and on the gaming table.  If you created a longer trunk than the 15-20mm trunks that I did, then you might decide to pay a bit more attention to modelling the trunks or risk seeing the twisted wire.


I sprinkled a bit of grit and sand onto the paint to give it some more texture.  Once dry, I then used some of the 25% PVA/75% water and painted this onto the base, then dipped into a tub of flock to finish the bases off.  Here is what a finished tree looks like, though I didn't match the base of this particular tree to that part of the gaming table!


Materials & Tools

The things that I used to make about 30 trees were:
  • 4 metres of hedgehog gutter brush
  • PVA glue and water
  • Woodland Scenics dark green coarse turf (and maybe a lighter colour for highlighting)
  • Spray adhesive
  • Something to base the trees on
  • Hot glue sticks
  • Brown paint
  • Sand or grit
  • Some flock material

  • Heavy duty wire cutters
  • Good pair of scissors
  • Latex gloves
  • Hot glue gun
  • Lolly sticks or coffee stirrers

Like Trees?

For those of you interested in making trees and vegetation, I have written a few more blog posts regarding how I made olive trees, agave cactus and low, scrubby vegetation for a Mediterranean or desert-themed gaming table. I'm planning on doing a piece about Aleppo pine trees soon too. 

I hope this gives you some ideas and inspiration; share your thoughts in the comments below.

Sunday, 26 January 2020

Gaming with my 10 year old

Introducing my son to gaming

I've been trying to encourage the next generation of wargamers (i.e. my son, Tom) to get involved before he gets too old and discovers beer and girls. I reckon I have a few years before he becomes too much like 'Kevin the teenager'.  We played a game of Iron Cross from Great Escape Games this weekend on my winter table.  Iron Cross is a fast play set of WWII skirmish rules.

I meant to take more photos and do a proper AAR, but got side-tracked teaching him the rules and also trying to explain the reasoning behind some of the tactical decisions that I was making, so that he could learn a little about tactics.


We started on opposing tables edges and played a simple "Meeting Engagement" scenario. The table was set up with a small hamlet set off to one side, a few other randomly positioned buildings, a railway track running across the centre of the table, complete with an armoured train parked up in the sidings, and lots of trees and hedges to break up line-of-sight.

Tom played as the British with 3 Shermans, 3 units of infantry and an HQ unit. I played as the Germans using the same number of infantry, but only 2 Panthers, which balances out in terms of points value.


Despite my tactical advice, Tom pushed his Shermans forward quickly with limited infantry support. It turned out to be good decision and (maybe aided by some good dice rolls) quickly picked off one of my Panthers, which was lurking behind one of the ruined buildings.


Spurred on by his early success (only the second turn!), he continued to press forward. My dice rolling didn't help, though I did manage to destroy one of his Shermans fairly quickly, which caused him to slow his advance. By this time, both of us had brought our infantry further to the front line and started pouring fire onto each other.

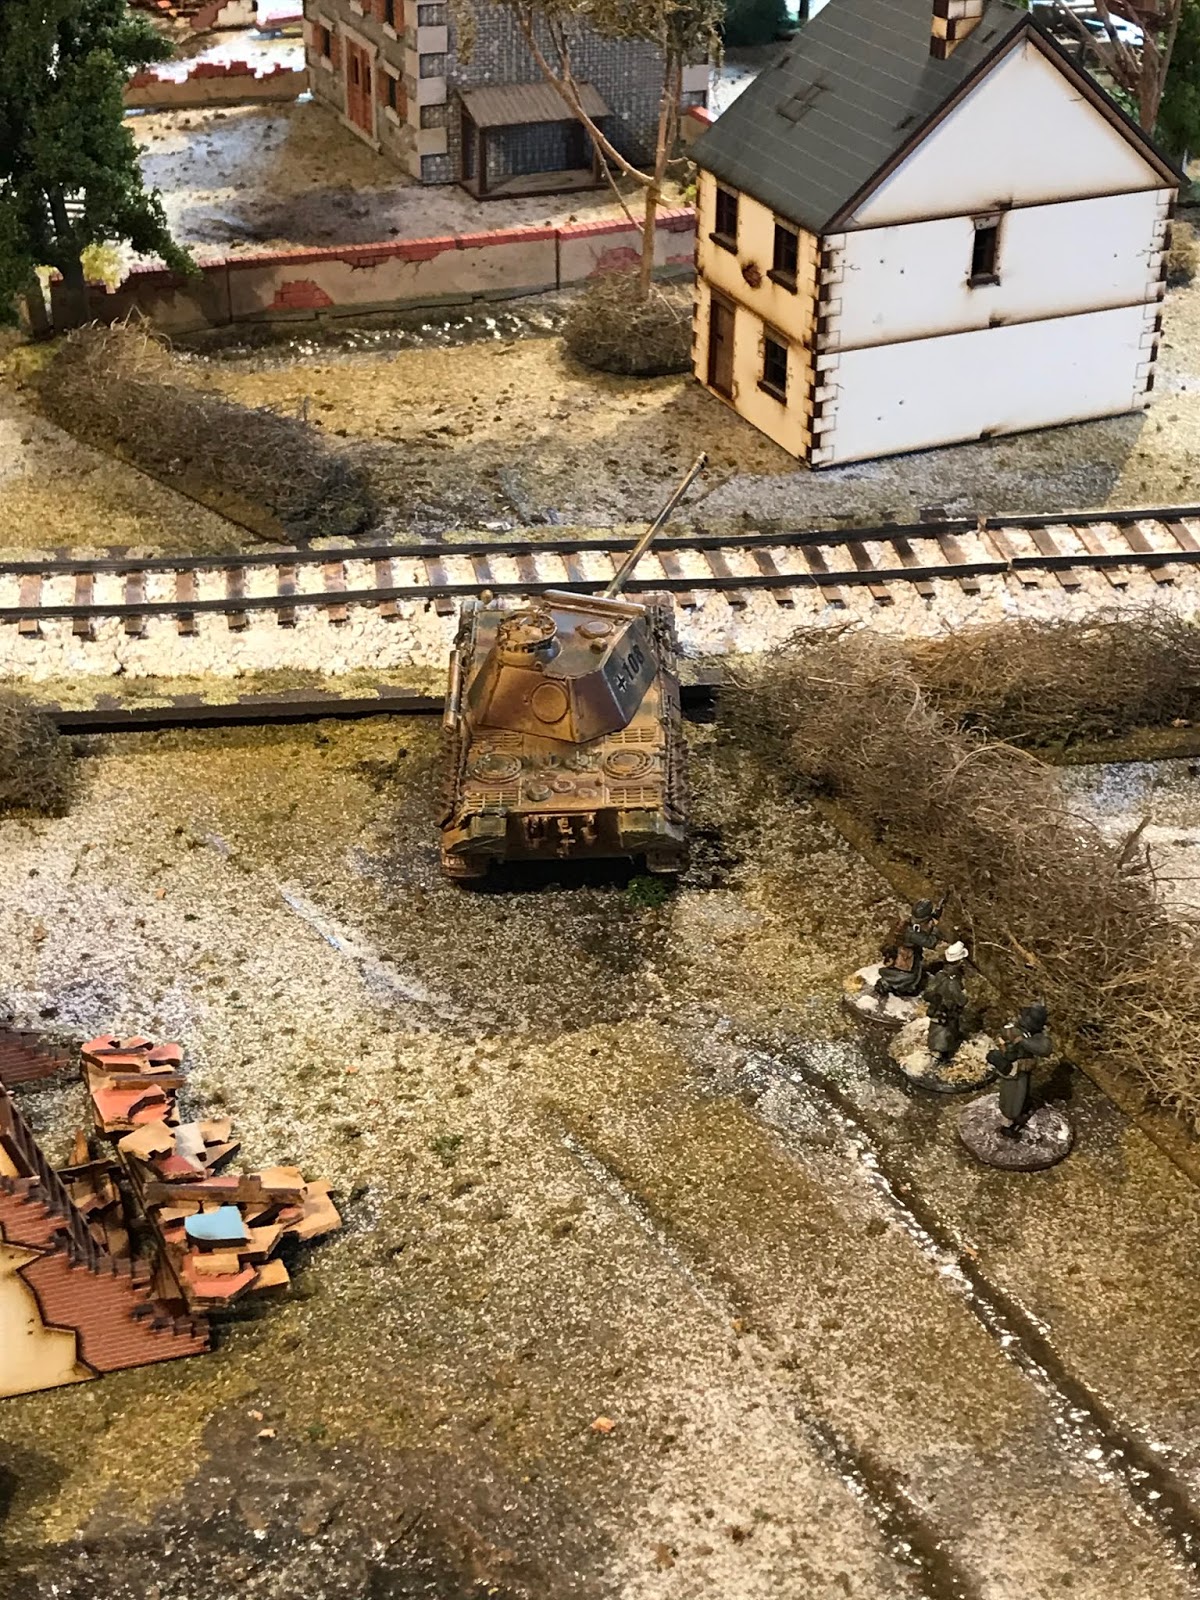
The infantry battle, supported by the tanks, for the centre ground lasted for a few turns before my infantry started to accumulate too many morale points, which forced me to start spending command tokens on some Company Morale Tests. Here is my remaining Panther with the HQ squad just to the right. Tom's forces are just out of shot at the top of the photo using the cover of several buildings.


The game lasted just over an hour, but was still fun. It is nice to be able to do something that we both enjoy, even though I did end up losing!  After losing the Panther very early on, and then losing an infantry squad, the number of command tokens I had reduced to the point where it was difficult to get much of an attack going whilst maintaining morale.  Now that he has got the hang of it, we will be able to play a game with more points, more toys on the table and a decent number of command tokens each.


The final shot above is one of my infantry units advancing to the railway line about halfway through the game. To help Tom focus on learning the rules, we only played with three models per unit to keep the movement simple.

Sunday, 19 January 2020

Painting the remnants of my Fallschirmjager

Finishing off the FJs

I painted a platoon of FJ from Great Escape Games, which are a mixture of Artizan Designs models and Wargames Foundry, last Christmas (2018), but for some reason left 5 models on the lead mountain. I picked them up a couple of days ago and thought that I would finish them off.

Here are a couple of pics of some of the finished models.


Here are the work-in-progress models with just some of the base colours blocked in so far.


One thing that I have really noticed in the intervening 12 months is that my eyesight and my memory have both deteriorated significantly! For the life of me, I cannot remember the original colours that I used for the completed models; and secondly, I'm really struggling to see the detail when painting.  I borrowed my son's magnifying glass yesterday evening and looked at the 5 guys I am trying to paint. ;-(  It looks like a trip to Specsavers is in order to get some reading glasses.

Winter table - part 4

Applying the Detailing

Once all the paint had dried, which took a lot longer than planned, I started to apply some additional detailing. The table was being worked on in a cold shed in the middle of winter!  I ended up getting a couple of small electric heaters and a fan to blow warm air across the table to dry it out.

I wanted to replicate the standing water in the muddy track from my inspiration photos, but during the painting phase I decided that I also wanted to add some ice and a little bit of snow to make it look truly wintry.  To simulate that, I bought some wet-look varnish from B&Q (no, I'm not sponsored by them, they have a store just down the road from where I live and nothing that I pick up there really costs very much) and painted it onto the areas where I was going to leave visible water e.g. in the ditches and depressions in the ground, in the tyre tracks and some random puddles.


When first painted on, it goes down white, which is helpful to see where you have applied it to, but it dries with a glossy finish. The marshy area got lots of the wood varnish.


The poor lighting in the photos actually show up where the varnish was applied.


You can see the variations in the colours starting to create the effect that I was going for now. Keep reading to the end of this blog to see some better photos of the finished gaming table. ;-)


Again, after a significant amount of drying time in the freezing shed, I started to apply some more detailing.  Using weathering powders, I changed the colour of the earth in some the areas that I was intending to show through the grass flock. On reflection, I should have done this before applying the wet-look varnish because it obscured the wet earth effect too much.


So, back to the varnish to re-apply the areas where I wanted to model water/ice.


Whilst all this might seem that it took a lot of time, the only real time to get to this point was due to having to wait for the various things to dry properly. If I recall correctly, I think to get to this point only took about several hours of actual work.  Lots of standing around drinking tea looking at and reminding myself to start the next project in the spring!

One of the things that I did do whilst waiting for paint and varnish to dry was to make some conifers. These are made from a type of wire brush that you lay into guttering to stop moss and leaves building up. I'll write up another blog about how I created those.


I forgot to take as many photos during the next stage, which was to apply flock and scatter material.  I used three different colours of flock, and a couple of packets of scatter material, from Javis and randomly sprinkled these from height over different parts of the table.  The idea, again, was to ensure that nothing looked too uniform, so a bit of dark green sprinkled into a larger patch of light green just breaks up the evenness and texture.

After using a dry paint brush to remove any flock from areas that I wanted to leave the wet earth exposed (bottom of craters, tyre tracks, ditches etc), I used some watered down PVA glue in a spray bottle to affix the flock to where it had settled then left it to dry.


Another little job that I accomplished whilst waiting for things to dry was to make some hedges. This was really simple: I bought a sheet of rubberised horse hair, cut it up into hedge shapes with a pair of scissors and then applied some extra colour (mostly green) using spray paints.  Because my terrain table is winter-themed, the basic brown colour of the horse hair didn't need much doing to it to ensure that it looked like a wintry hedge to break up line-of-sight. I'll perhaps write a short blog post describing the hedge building in more detail too.


The only thing left to do to finish it off is to apply some snow coloured flock and then get gaming!

Nuenen House #3 Finished?

I thought that I had finished this first house in my Band of Brothers project, but after looking at it on my painting table for the last few...