Progress on this terrain piece has been a little slow this week due to work and family stuff, but I've now finished. However, I might add some dust effects to the bottom of the wagon to make it look a little bit more weathered.


Here are a few of the in-progress shots picking up from where I left off in the last post. After sticking everything to the base and adding sand and fine grit, I then primed the whole thing with grey car primer from Halfords.

The next step was painting the base colour using some Dulux tester pots. Whilst the brown base colour was still wet, I dripped some diluted grey paint onto the brown to create a patchy, non-uniform effect. Once the base colour had fully dried, I dry-brushed a lighter brown over the top to highlight the texture.


Next, I painted the base colours, then the highlights onto each of the models, including the wagon.


The final step was to paint on some PVA glue and scatter a mix of various flock, static grass and clump that I had pre-prepared in a tub, then leave it to dry.

Whilst I was flocking, I also went and grabbed a couple of other pieces that I have worked on recently, but not yet flocked. One of them was the destroyed Panzer III, which I have written several posts about.


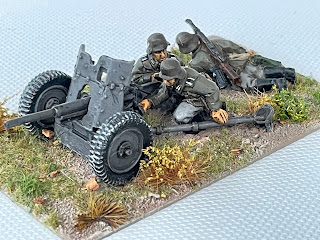
The other piece that I finished basing today was a Pak36 gun and crew.


hat wagon turned out very well and the basing looks great. I like both variety and the colour of the shrubs and tufts.
ReplyDeleteThanks Codsticker. It was a fun little project, although it took a lot longer than I thought it would.
ReplyDelete